

 I started using Snagit 2 months ago, and it has been my favorite screen capture tool so far.
I use it mainly for this website, and I have found it is the best screen capture tool available on the market.
Snagit offers way more possibilities, increases productivity, and creates more professional and stylish images.
In this Snagit Review, I will show you the main features of this great software and how it can help you with website creation.
Discovering Snagit
Pictures are worth a thousand words! Have you ever heard of this idiom? Well, if you have a website and you frequently show people how to do this and that, you know exactly how it is.
Having started this website, I quickly realized I needed more versatile software to make my life easier. After all, pressing the print screen button and editing the image in Paint was out of the picture!
First, I came to know the Snipping Tool available in Windows. Selecting the areas and editing was very easy and straightforward. I could highlight phrases, use the pen, rubber, and… nothing else! The snipping tool is very limited in terms of editing.

Then I started looking for free alternatives to the snipping tool. I wanted to add arrows, circles (as above), numbers, callouts, and many other useful features that I knew other webmasters were using. But I just couldn’t find everything in one single software. Besides, some of them were not very user-friendly.
I found Snagit! As Snagit is always listed among the best software of its genre and offers a 15-day free trial, I decided to go for it. Yep, that was exactly what I needed! In fact, it exceeded my expectations.
It not only captures images but also videos from your screen! I am not using the video recorder at the moment, I know it will be very useful when I start creating video tutorials in the future.
Snagit Speeds Up Your Job! If you are constantly repeating the process of screen capturing and editing, you can lose significant time that otherwise could be spent on research or content creation. Snagit offers a very efficient system that will make you way more productive.

==>> Click Here to download SNAGIT and try it for FREE!
Available for Mac and PC
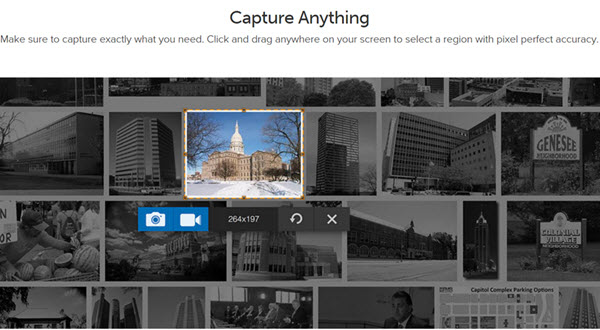
Capture Anything You Want!
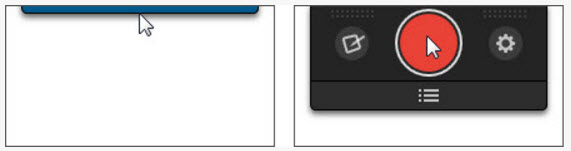
Once installed, a capture window will be available on the corner of your monitor. You can move your cursor to the window and click the red capture button to select an area.
You can select a specific window, the fullscreen, or any portion of the screen. One of the things I find really useful is that it can capture the whole page, including the part you would have to scroll down to see. I couldn’t find any free software with this handy option.
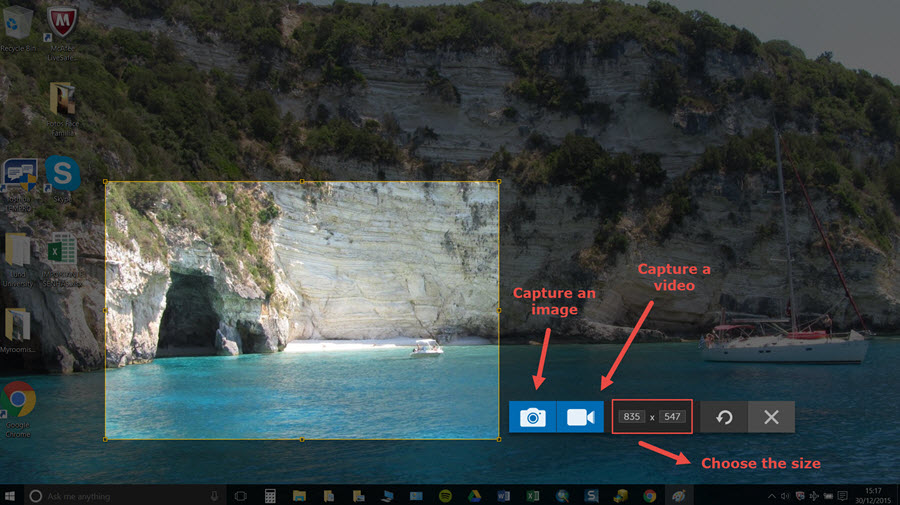
After you make your selection, you just have to choose if you want an image or a video. You can even select the exact size of it by inserting the dimension in pixel values (width and height).
A Staggering Amount of Resources!
Next, the editor will open, and you will have a staggering amount of resources on your hands. Those are the nice things you will get:
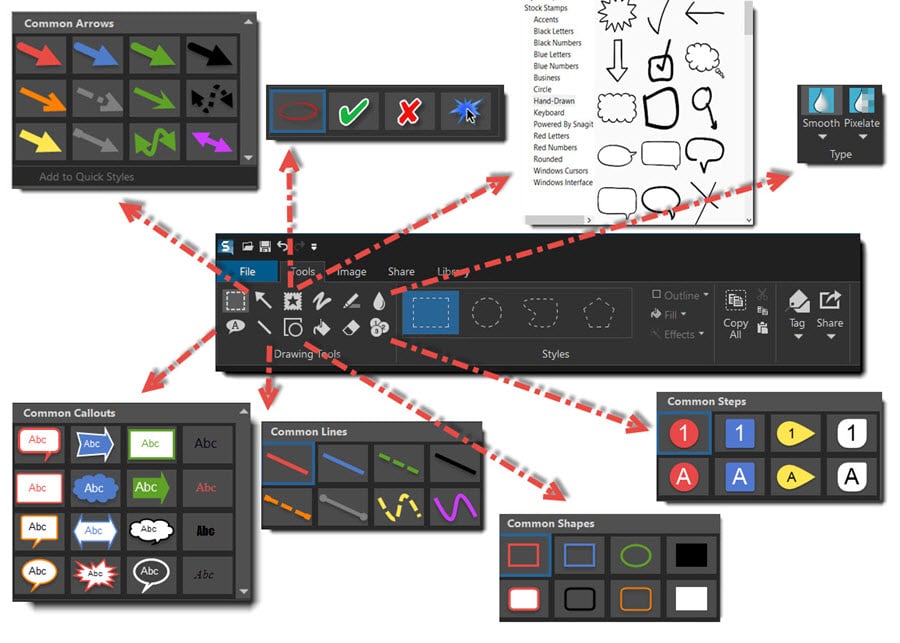
I tried to include all the main features in one image, but there are so many options that I need to create another one:
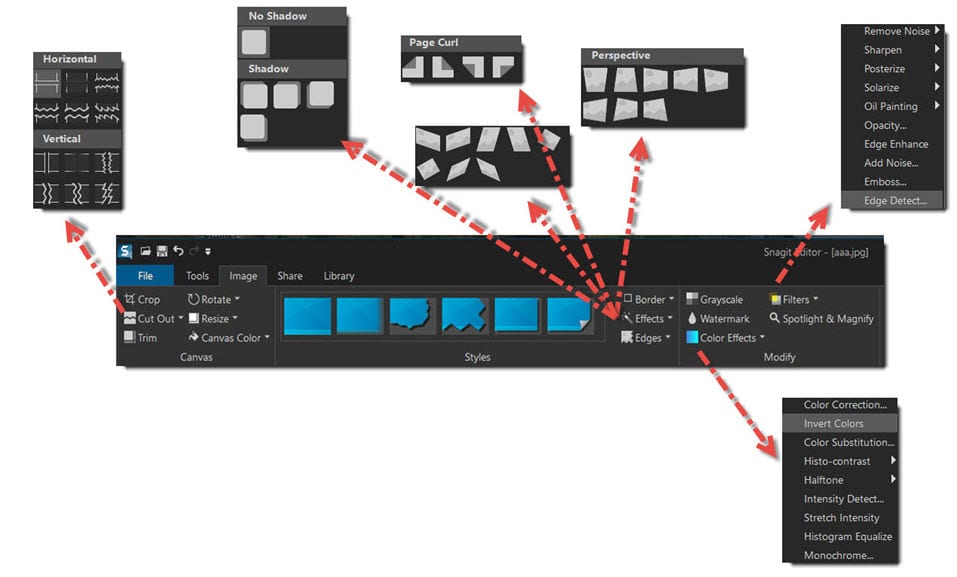
It is not possible to show everything Snagit has to offer in one single post, but I will try to highlight some of the cool things that I use.
Arrows, Shapes, Borders, and Text With Different Fonts and Colors
You can use different colors, shapes, arrows, text fonts, and borders for your screenshots.
Arrow is the main weapon I use inside Snagit. This is because I am always showing people where to click, explaining specific things about a program, and also providing evidence of what I am talking about.

This reward platform is going viral! Cash out via PayPal, Visa, Gift Cards, and in-game currencies - Click here to find out how to generate an extra $10+ per day!
But I don’t limit myself to arrows, I also use the highlight tool a lot, which is really nice if I want to draw attention to a specific statement in a paragraph. This is what I usually do when I want to take a snippet of text and indicate the important parts:
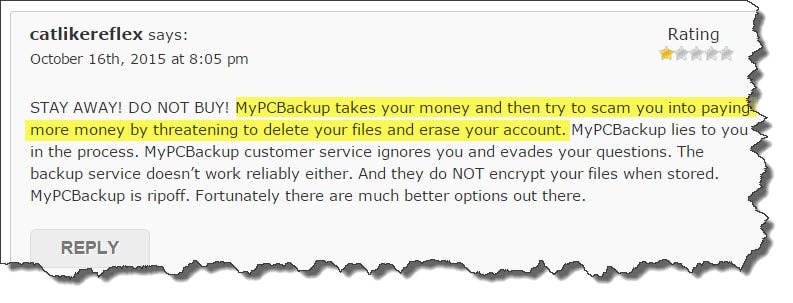
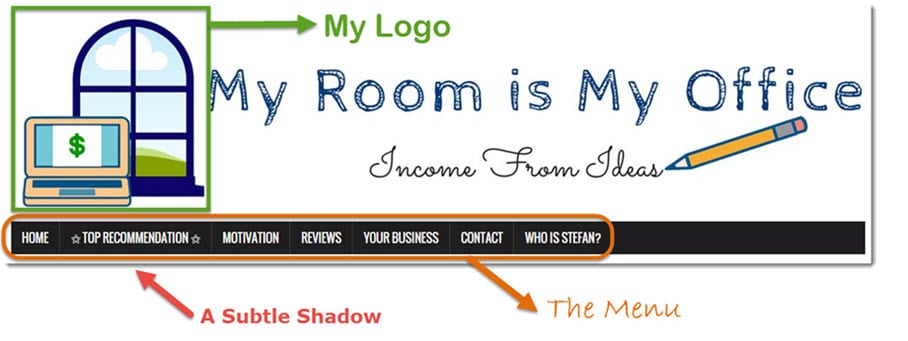
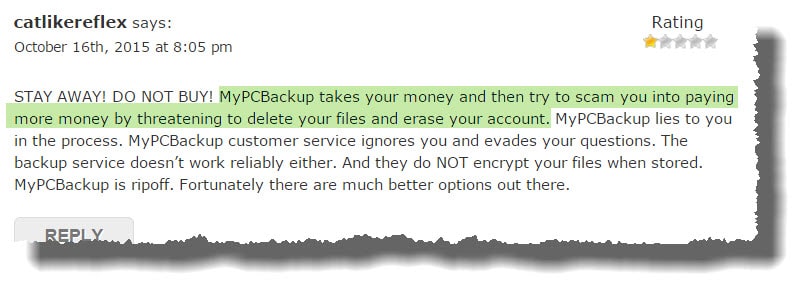
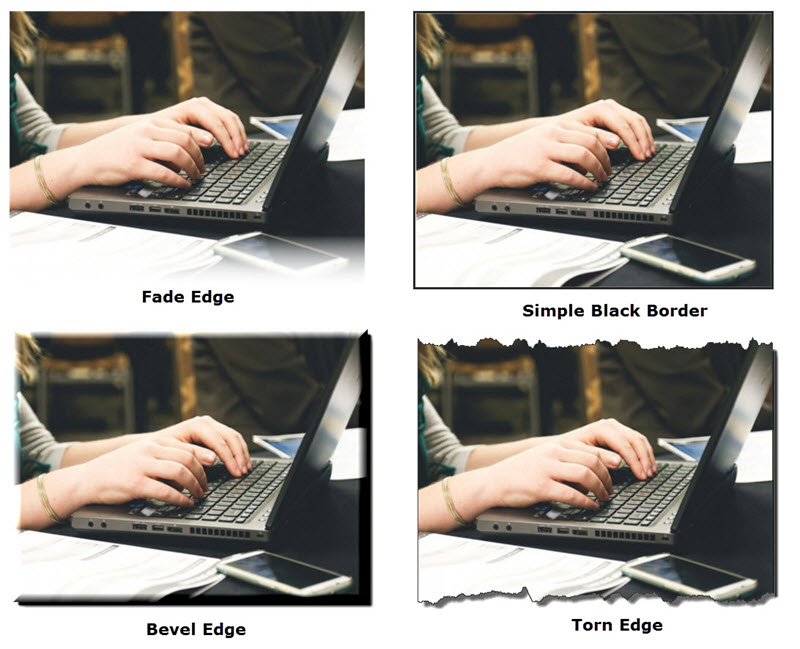
In those cases, I like to add a shredded border, which also comes with shadows. What you are going to like about Snagit is that most of the options are customizable. So, let’s say you want a more subtle shredding, more pronounced shadow, and a different highlighter color. No problem! Here is the result:
Personalized borders give a more professional look to your website, and it helps to differentiate screenshots from the rest of your content. Borders are definitely my favorite feature inside Snagit.
Bubbles, Blurring Tool, Cool Stamps and Perspective
I like to use a little bit of humor in my reviews, and it’s great to use speech bubbles sometimes. Well, I don’t usually make fun of people like that, but some people really deserve it. 🙂

Sometimes you need to show a screenshot, but you want to hide a piece of information or an image for some reason. Snagit has the blur tool for that. So, blurred the millionaire’s face because maybe she doesn’t want to be famous. 🙂
There are also other types of bubbles, shapes, and arrows that you can use to visually communicate information.

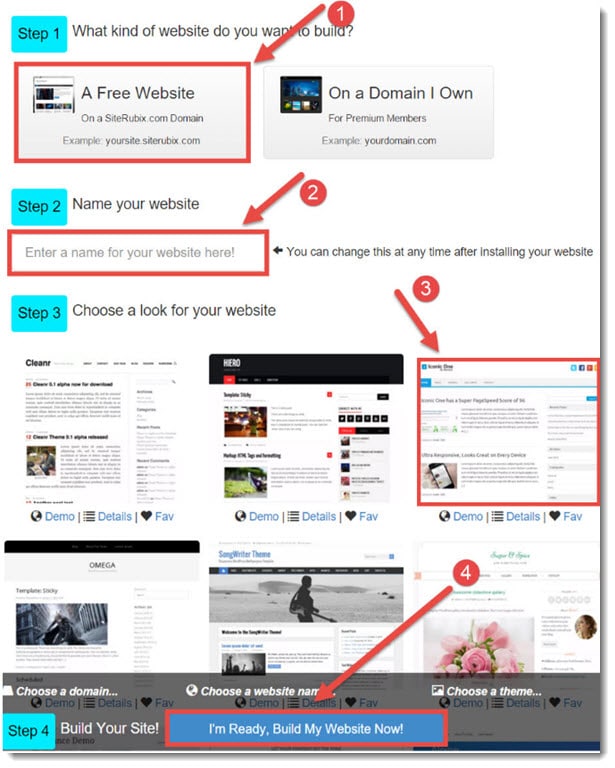
The stamps of numbers are really useful because maybe you want to show a step-by-step, for example.
In the example below, I used the numbers to indicate a sequence of how to quickly build a website inside Wealthy Affiliate. I was able to take an extended screenshot of all the steps in the page.
There is a huge variety of stamps available, and you can even download more from the official website. The “Great Job!” sign and the street signs were downloaded by the way. And those are some cool stamps that I use sometimes:


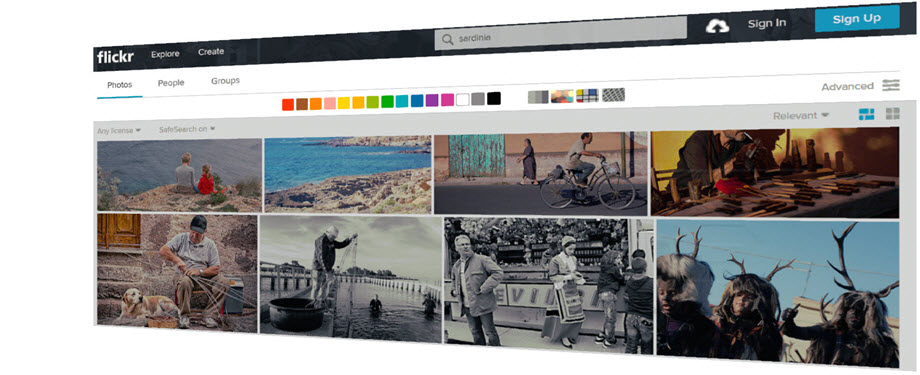
And… this is the perspective effect I applied on the Flickr website. I think it’s awesome, and you can apply it from different angles!
There are also a number of color effects and filters that you can normally find in other editors. Some examples include brightness, sharpness, opacity, contrast, grayscale, and many others. You can find all these editing tools and much more in other advanced photo editors like Photoshop and Gimp. However, Snagit has pretty much everything I need for editing, and, in addition, it makes the whole process so much easier and quicker.
Once you have your image or video, you can save or send it directly to many popular places like Facebook, Twitter, Google Drive, Microsoft Word/Powerpoint, Skype, Screencast.com, and Youtube (in the case of video), among others.
You can even synchronize Snagit with your mobile phone! Using the Fuse App, you can take pictures with your mobile and send them directly to Snagit to start editing straight away!
Conclusion
In this review, I have shown you the best of Snagit and how it can help you with your daily tasks. As an internet marketer that uses at least 2 screenshots per article, I consider this software essential for my editions.
As my online business is in its infancy at the moment, I really tried to save money and go for a free tool. However, I struggle to find a decent one, and when I tried Snagit for free during the first 15 days, I realized there was no way back!
I clearly noticed that my articles became more attractive and unique. In addition, I started doing things quickly because there is no need to open different editors to achieve the results I want. I simply have everything I need in one place!
Above all, I am able to express myself better and help people more effectively as a result.
If you are really serious about website creation and care about how well the images and information are transmitted to your readers, then Snagit is a one-time investment worth making.
Do you want to give a professional look to your website?
Click Here to download SNAGIT and try it for FREE!
Available for Mac and PC
Have you ever tried Snagit? I would love to hear about your experience in using the program! If you have any questions about it, please leave a message below, and I will get back to you as soon as possible.
Thanks for reading this article!
Your Friend,
Stefan